|
|
Common Vision Blox 14.1
|
|
|
Common Vision Blox 14.1
|
Contents:
Acquiring over CVB into CUDA memory
The modular embedded technology unifies two powerful tools for combining high efficient image acquisiton over Common Vision Blox (CVB) and paralellized general purpose GPU computation via NVIDIAs CUDA platform. More general documentation on the 3rd generation of the CVB acquisition stack and NVIDIA CUDA can be found in the following links:
Although this is a specific guide for the modular embedded system (aarch64), there are ways to build the sample on other platforms.
CppCudaMemory example ($CVB/tutorial/ImageManager/Cvb++/CppCudaMemory)jetson_clocks (documentation).See this page for Windows installation or this documentation for other Linux platforms.
To develop kernels for Nvidia GPU, the CUDA programming model can be used. Apart from the ability to write C++ kernels (dedicated highly parallel computation functions) that are run on the GPU, it also provides runtime API functions that allow controlling the GPUs' behavior. The heterogeneous programming approach uses both the CPU and GPU. In this model, the CPU and its memory is referred to as the host, while the GPU and its memory will be denoted as the device. The host can manage memory on both the host and device, and on the other hand initiate kernels, which are functions executed on the device by multiple GPU threads simultaneously. For allocating memory on the GPU, cudaMalloc is provided for example. To provide access to relevant data, memory can either be explicitly copied from CPU to GPU memory (cudaMemcpy, cudaMemcpyAsync), or provided in mapped device accessible host memory (cudaHostAlloc with the flag cudaHostAllocMapped). The mapped memory can be used as effectively “zero-copy” memory as the GPU can work directly on that data through the corresponding device pointer (cudaHostGetDevicePointer). Additionally, so called managed memory can be used (cudaMallocManaged). When using the last option, the same pointer is used on CPU and GPU. The CUDA driver ensures that the memory is automatically available on the device where it is used. Note: Windows and embedded devices have restrictions when using managed memory. cudaStreamAttachMemAsync has to be used there. The device visible host memory and managed memory can be used to more efficiently stream acquired data to the GPU. In the tutorial the constant value USE_MANAGED_MEMORY selects whether the mapped or managed memory variant is used.
The CVB acquisition stack allows directly streaming acquired data from cameras into GPU accessible memory. This CppCudaMemory tutorial exemplary demonstrates this compatibility with the CUDA programming model. It uses the CVB++ API wrappers and CUDA.
The main customization point in the CVB acquisition stack to enable streaming into GPU accessible memory is the flow set. In the CppUserAllocatedMemory example and corresponding documentation, the usage of this is already written down. Here the process for direct interaction with CUDA is described.
A developer defined UserFlowSetPool derived from Cvb::Driver::FlowSetPool is used to override the memory management behavior. From now on, the user is free to choose between managed or mapped memory allocation. First, the stream requirements are asked from CVB++:
When createing the custom flow set pool, the required memory for the flow sets is allocated. GPU accessible memory shall be used here. The std::generate_n will insert NUM_BUFFERS elements into the user flowSetPoolPtr. In this example, for every flow inside a flow set an independent memory region is allocated.
cudaMallocManaged is used to allocate the buffer with the requested size. cudaMemAttachHost is given as flag to specify that the allocated memory is initially accessible by the host. This is required if cudaDevAttrConcurrentManagedAccess is not available, as the CVB driver will write to the buffer from the CPU.cudaHostAlloc with the flag cudaHostAllocMapped allocates memory on the host that is accessible by the GPU. When additionally setting cudaHostAllocWriteCombined, reading that memory from the GPU is more efficient but caching of the data is disabled on the host, which in turn leads to slow reads on CPU. Thus, the acquired buffers should mainly be consumed on the GPU.After registering the flow set pool, it will be used by the acquisition engine internally. Therefore when using stream->WaitFor(TIMEOUT) to acquire a frame, the memory used by the composite is the CUDA allocated memory. In the tutorial, the first element of the composite is assumed to be an image with linear memory layout. The base pointer of the linearAccess corresponds to the originally allocated pointer. The usage of that pointer should be handled again depending on the way the memory was allocated:
cudaStreamAttachMemAsync), it can be used on the GPU inside a CUDA kernel. When done using the memory on the GPU, the attachment should be changed to the CPU again.cudaHostGetDevicePointer is used.Independent of the memory management mode used: before releasing the composite from the WaitFor call, which enables the acquisition engine to reuse that memory, it has to be ensured that all uses of the pointer (including the cudaStreamAttachMemAsync call) have been completed. cudaStreamSynchronize is used in the tutorial to ensure this.
In this example, a sobel kernel is run on the acquired image. The kernel's target buffer is manually managed CUDA memory. To use the target memory with CVB processing functions, it can be wrapped in a Cvb::WrappedImage. Note: The image is not copied but the given buffer is worked on directly.
For resource cleanup, the destructor of the UserFlowSetPool should use the respective memory freeing function for the corresponding memory regions:
We aim to make embedded boards easy to use. However, the difficulty of finding suitable and compatible versions of 3rd party software can be an obstacle. This section provides installation guidelines and details on the compatibility of various applications and software versions with the modular embedded system, specifically for the Jetson Xavier NX platform.
sdkmanager –archivedversions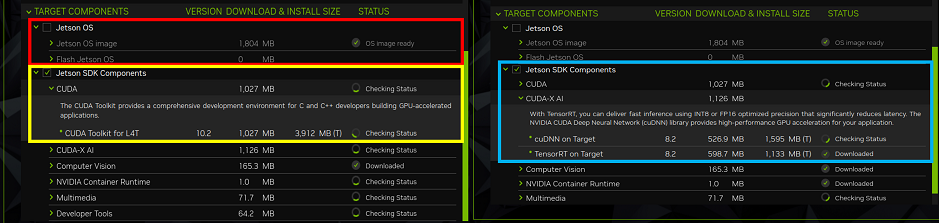
Verification: Executing dpkg -l | grep cuda will display an output similar to the one shown below, which verifies that the installation is complete.
Input (Shell):
Output (Shell):
Verification: The installation of TensorFlow and GPU usage.
Input (Shell):
Output (Shell):
Input (Python):
Output (Shell):
Verification: The installation of PyTorch and GPU usage.
Input (Shell):
Output (Shell):
Input (Python):
Output (Shell):
Verification: The installation of ONNX Runtime.
Input (Shell):
Output (Shell):