|
|
Common Vision Blox 14.0
|
|
|
Common Vision Blox 14.0
|
Getting to know your Modular Embedded Board
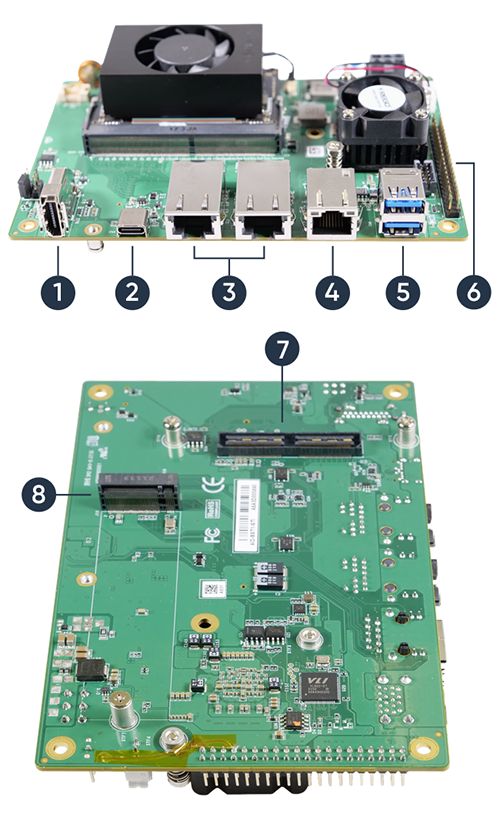
| Nr. | Connection | Nr. | Connection |
|---|---|---|---|
| 1 | 1x HDMI Type A | 2 | 1x USB Type C (OTG)* |
| 3 | 2x 10 GigE RJ45 | 4 | 1x 1 GigE RJ45 |
| 5 | 2x USB 3.1 | 6 | 1x 40 pin header |
| 7 | 2x MIPI CSI-2 (2x4 Lanes)** | 8 | 1x M.2 socket for peripherals** |
By default, without modifying the J7 connector pins, the board boots as soon as it is connected to a power supply.
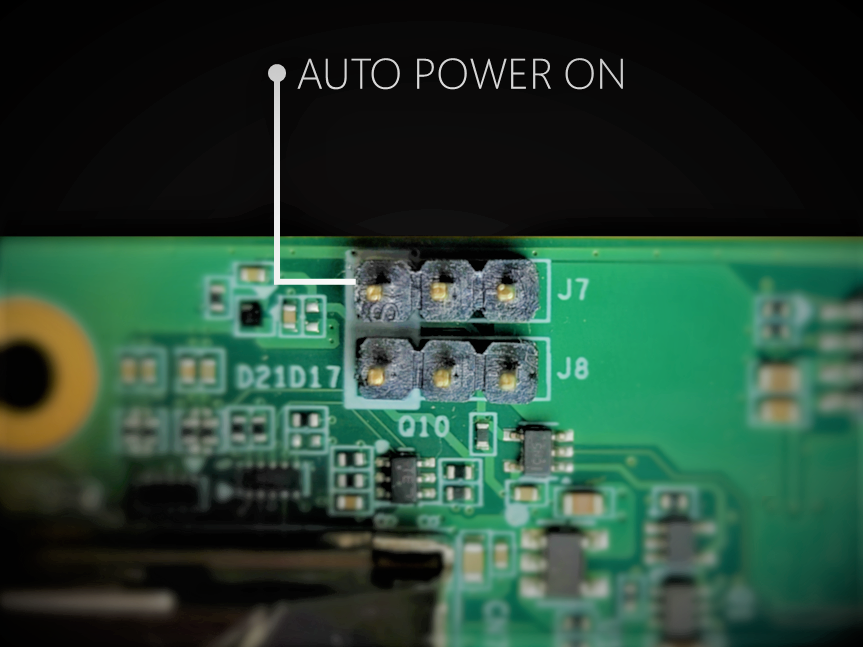
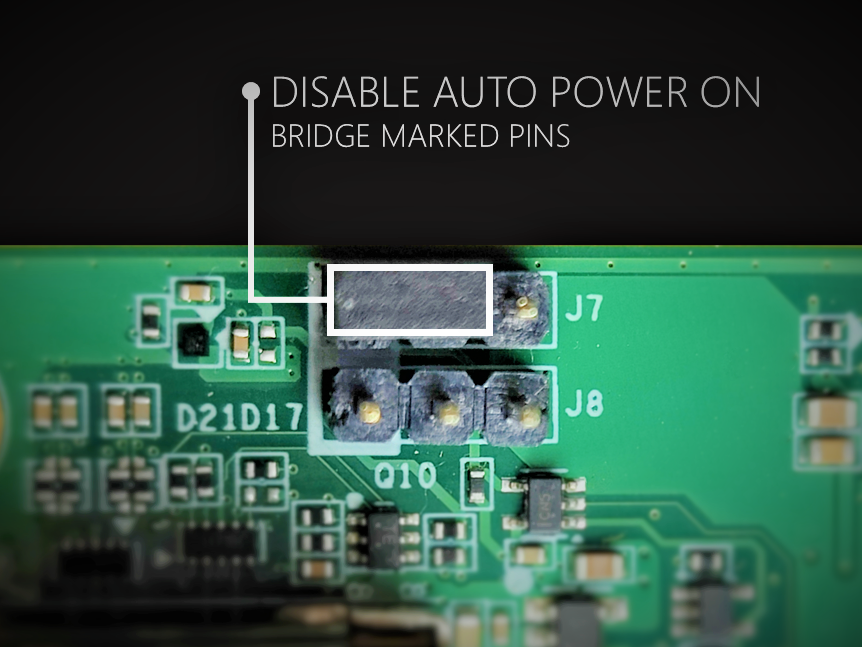
In order to disable that behavior, bridge the marked pins from connector J7:
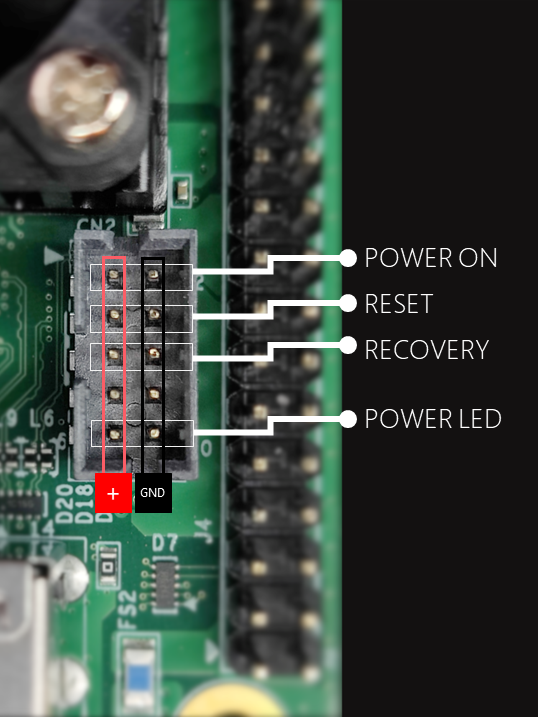
Use the CN2 connector for board control. The pins of CN2 are connecting the power on trigger, the reset trigger, the recovery mode trigger and a status led output. See the following pin order for the correct setup.
See here.
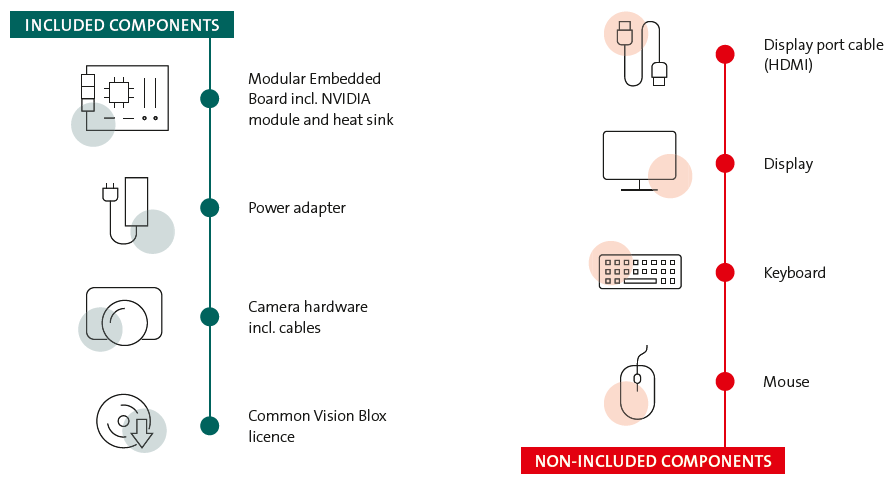
Connect your camera/s to the Modular Embedded Board.
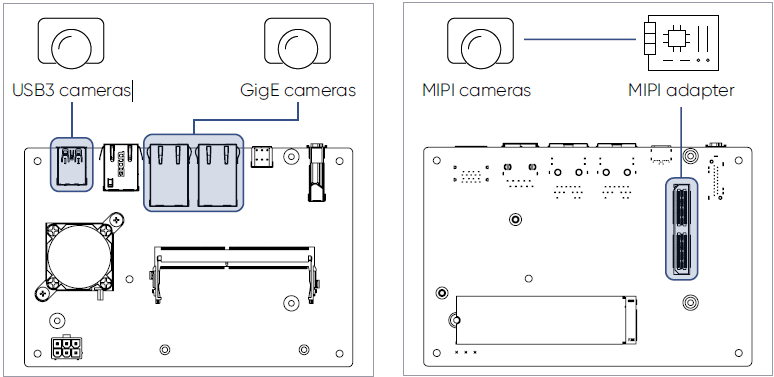
Note: If you want to connect MIPI cameras, you will need the AV adapter board for Jetson TX2 and Xavier AGX. Despite its name (it has been designed for Nvidia's TX2 development carrier and the Xavier AGX) the board with also work with the Xavier NX on the STEMMER IMAGING Modular Embedded carrier. Details about the connector can be found here.
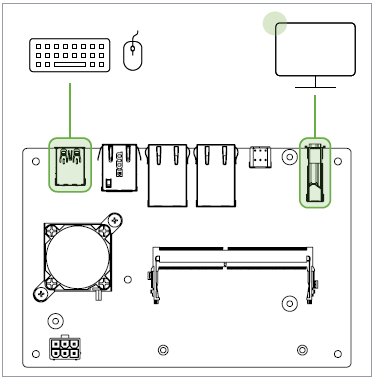
Connect the Display port of the Modular Embedded Board via a Display cable (HDMI) with your display.
Link the power connector cable with the industrial power adapter and connect it to the DC-in port of the Modular Embedded Board.
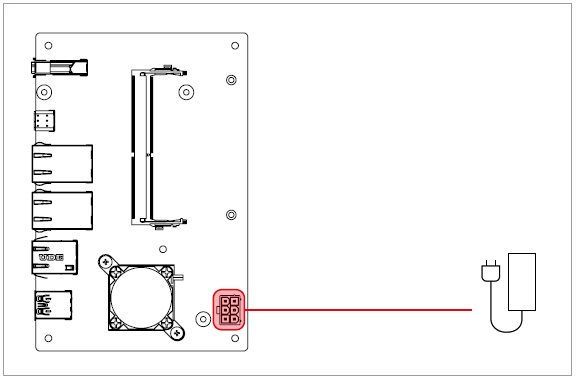
Plug the power connector cable into your power supply. Wait until the input mask appears on your screen and log in with
login: nvidia
password: nvidia
Warning: Flashing your Modular Embedded device with a stock image will disable the fan on the X550 chipset that provides the 10 GigE interface. This may cause damage to your device!
In order to restore the fan's functionality, apple the following patch to your Jetson image on the host system before flashing: https://ftp.commonvisionblox.com/webdavs/embedded/JetPack4.6.1/patches/R32_7_1_Xavier_NX_JCD02_3_Aetina_sources.tar.gz
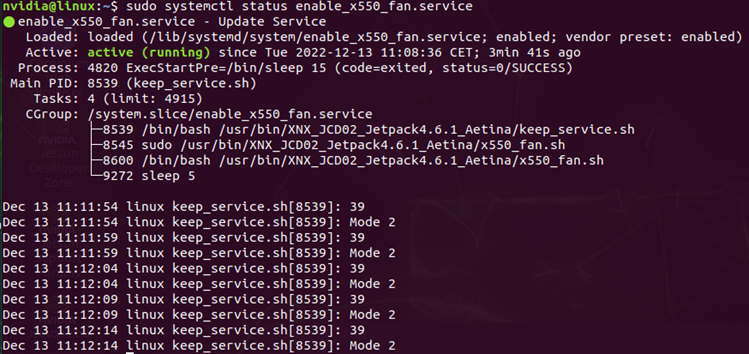
After booting your device you can verify functionality of the X550 fan service with the following command:
If you have any questions, the following resources are available might be of use to you: