GigE Cameras supporting LAG (Link Aggregate Group)
Cameras supporting LAG (Link Aggregate Group or NIC Teaming) offer 2 GigE ports for image acquisition, so the available bandwith is duplicated to 230 MB/s with optimized network hardware.
These ports have to be combined as a Link Aggregate Group.
To use the LAG (for example AVT GX-series cameras) the settings of the NIC and the camera have to be adjusted.
NIC (Network Adapter Settings) :
Windows :
• Right click Network Connections -> Properties -> Configure ...
• Select Teaming tab -> enable "Team this adapter with other adapters"
• New Team... -> specify a name
• Select the two Ethernet ports to which the camera will be connected. These ports will form the LAG or TEAM
• Choose Static Link Aggregation
The LAG group will now be configured. Once completed the properties of the TEAM (LAG) that has just been created will appear.
A new Network Connections Icon corresponding to the LAG group is created.
After the NIC is prepared for LAG and the camera is connected with both Ethernet cables CVB can be used for the camera set up like it is recommended in the following:
STEP 1
Please perform all CVB GigE Performance settings as recommended for all GigE devices.
STEP 2
•Open the GenICam Browser
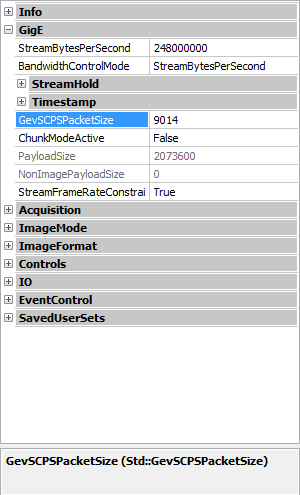
•Now the GeniCam Property grid (Nodemap) should be visible
•Please set Menu Options-Max Visibility to Guru
•In the NodeMap GigE set up the parameter GevSCPSPacketSize to 9014
•Save this settings in a UserSet e.g. UserSet1
STEP 3
•Open the GenICam Browser
•Select your camera and click on "Open Device"
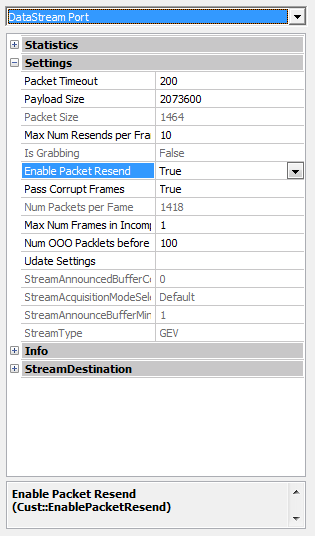
•Open the Nodemap DataStream Port via tab "DataStream Port" and set the following parameters:
oEnable Packet Resend: True
oNum OOO Packets before Resend: 100 - 200
Please take in mind that this two parameters cant be saved in the camera user settings. The settings are done interactively for testing as here described.
If you have your own application please check and set the parameters via the Nodemap functionality of the CVB Image Manager.
Please have a look at the CVB Manual and the sample code for retrieving Nodemap information from the DataStream Port.
STEP 4 (optional)
For performance and reliability tests please use the Common Vision Blox Viewer.
Open the Nodemap DataStream Port and the Device Nodemap via the Genicam menu and configure as described above in STEP 3.
Additional please open the Acquisition Statistics via the Extras menu and get information about lost or pending images.