Getting Started
with the CVB Configurator and follow the checklist for configuration of:
✓ driver
✓ acquisition hardware interface
✓ devices
Open the GenICam Browser
After starting GenICam Browser for the first time, the available transport layer (TL), available interfaces and devices are listed in a tree view under Available Devices.
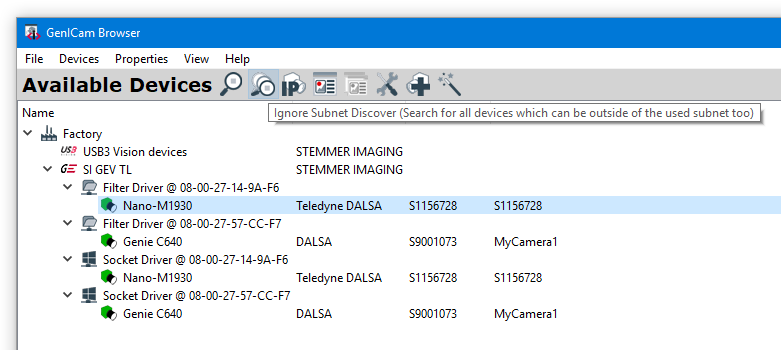
Discover Available Devices
To search for available devices and to refresh the Available Devices tree use the Ignore Subnet Discover button.
All available devices show up in Available Devices window.
Hardware relevant configuration steps have to be considered, refer:
Different camera symbol colors representing status information. Not displayed devices pointing to missing interface configuration.
For details refer GenICam Browser User Guide in Help menu or hints in the GenICam Browser Logging window.
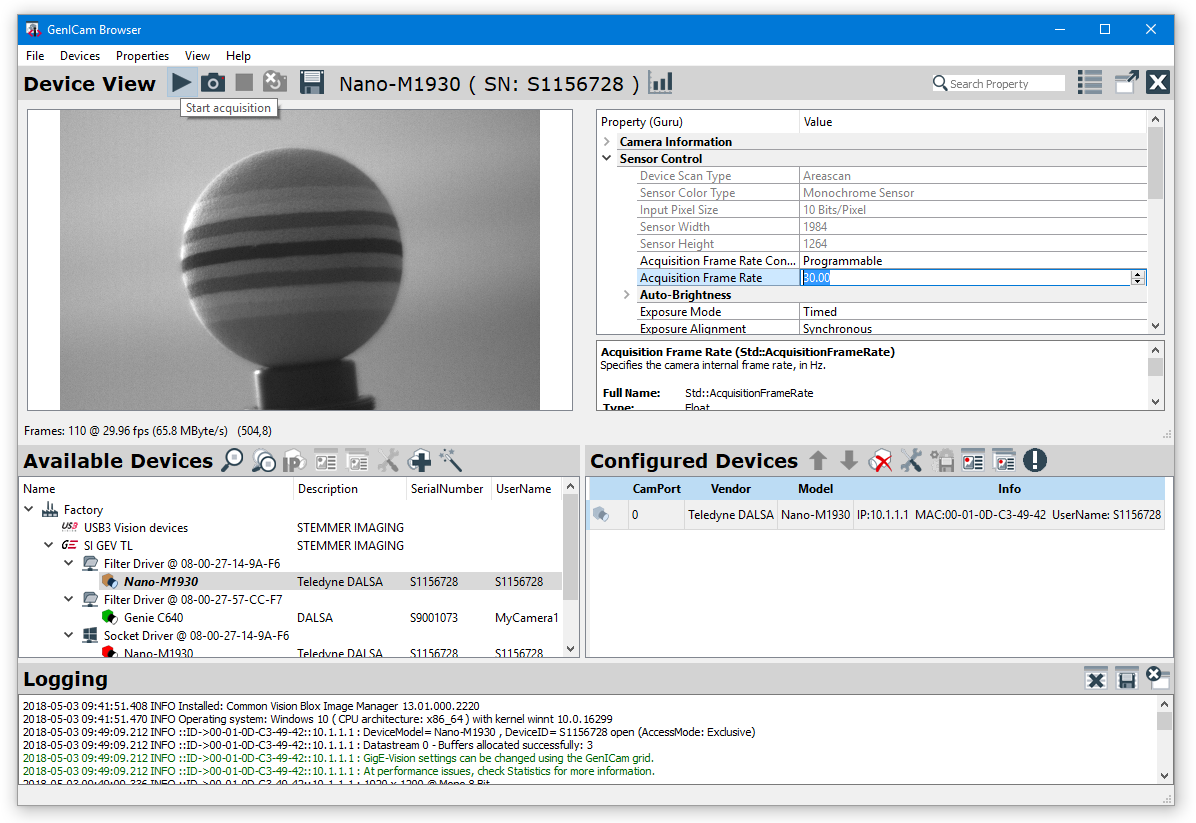
Open a Device for Live View
Doubleclick on the device (use Filter Driver in Windows and Socket Driver in Linux), which has a green camera icon now, or use the Open Device button to get a live view and to configure the device.
The device will be opened in the Device View.
On the left side a live image is shown, on the right side you will find the property grid to configure the device.
In Available Devices the device shows up with an orange icon (device is open).
In the Logging part of the application you get some detailed information.
To get a single image use the Snap button, to start the acquisition press the Grab button and to stop the acquisition press the Stop button.