GigE Vision must be identified by an unique IP address.
Addresses can be assigned both dynamically and statically.
Per default, GigE cameras try to establish a connection to the host machine based on dynamic addresses.
When plugged in, the camera first sends out a number of DHCP requests. If no answer is received within a fixed period of time (usually 60 s), the systems tries to auto configure the network via the LLA (Link Local Address) addressing scheme. LLA only works when both links are configured to be set dynamically (DHCP).
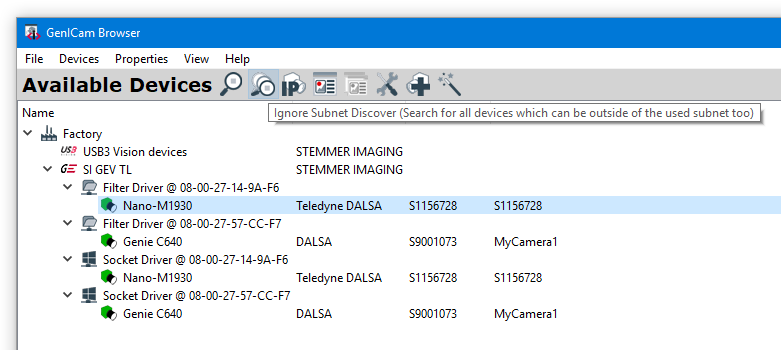
After starting GenICam Browser for the first time, the available transport layers (TL), available interfaces and devices are listed in a tree view under Available Devices.
To search for available devices and to refresh the Available Devices tree use the Discover button.
All available devices show up as green cameras. GigE devices are displayed under SI GEV TL :
Static IP addressing is available in two different forms:
•arbitrary addresses can be either assigned in a persistent fashion (Static IP) or
•only until the next power cycle of the camera device (Force IP).
In both cases, the address must be set within the NIC and with an application interfacing the camera.
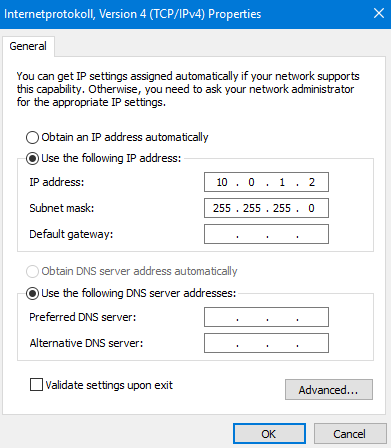
1) Settings on the Network Interface Card
Windows : Network and Internet, Network Connections |
Linux : Network connections |
 |
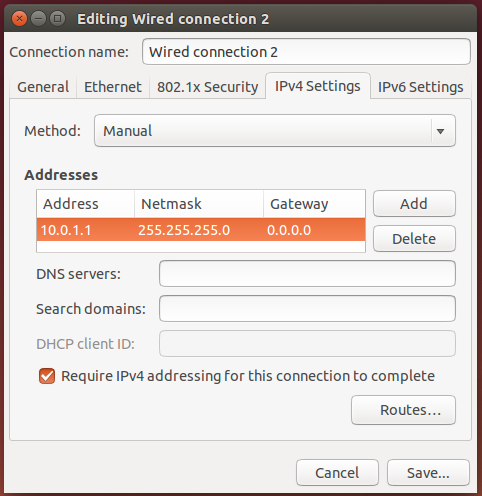 |
2) Settings for the camera
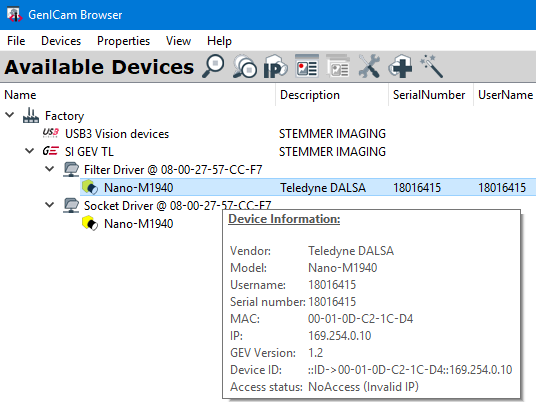
The camera may have another IP address configured or set as default. In the below example on the GenICam Browser the camera is found in another subnet (yellow icon).
The camera IP address info can be read by left clicking the camera symbol or right mouse click -> Info. Access status here is NoAccess (Invalid IP).
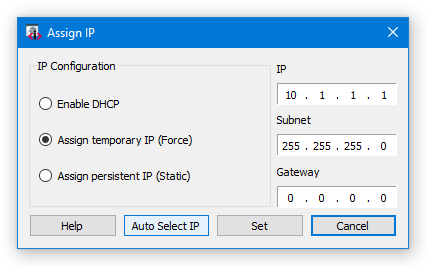
Setting the IP address matching the NIC configuration is to be done over the ![]() configuration in Available Devices menu:
configuration in Available Devices menu:
Force IP (fix over this power cycle) :
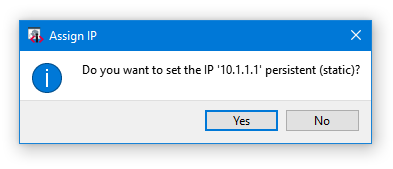
After each temporary IP setting it will be asked for storing it as static IP to keep the setting over restarts.
Select 'No' in in case of temporary IP, valid for this power cycle. With 'Yes' the IP address is set as static.
Static IP (always fix) :
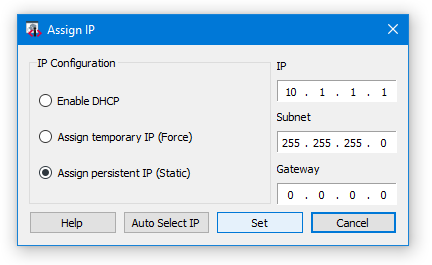
With both settings the camera icon has to be green with Access status: ReadWrite.